Role Based Access Control
What?
Module for managing permissions for users based on several criteria such as role, team, department or even user specific
Why?
To effectively control access to information within ServicePRO. In every Enterprise there is a need to make sure information is accessed only by those who require it. RBAC allows each department within an enterprise to segregate their data from other departments. This is very important for departments like HR and Accounting to handle sensitive information.
Accessing RBAC
Directory
To access RBAC in ServicePRO:
- Select the Setup/Administration icon from the ServicePRO Workbench.
- Select the Administration Tab at the top.
- Select Role Based Access Control from the top of the listing.
Views and Panes
You will be brought to the RBAC module’s main page, which is separated into several panes. These Views allow for a quick overview of what permissions have been assigned (items indicated in bold have either roles assigned it to directly or in a sub-item).
A View makes it easier to sort with either People, Organizational Hierarchy or Role as the first search criteria.
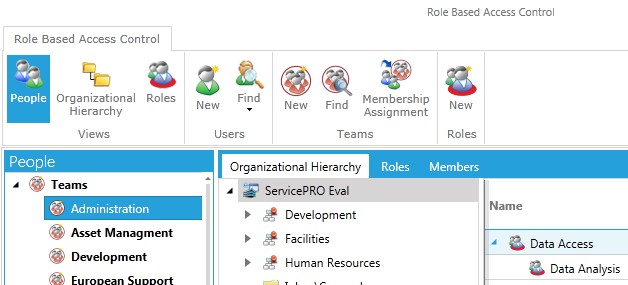
People
Selecting the People View will arrange Organizational Hierarchy and Roles into tabs in the right pane.
In this pane, entire Organizational Units or Departments are designated under the Teams category, and under that, individual Users can be found under the User category.
- If you highlight a Team under the People tab, it will also feature a Members tab, allowing you to look at who is in a set Team category at a glance.
- Similarly, if you highlight a User under the People tab, it will feature a Team Assignments tab, allowing you to see what Team or Organizational Unit that User is part of at a glance.
Organizational Hierarchy
Selecting Organizational Hierarchy View will arrange People and Roles into tabs in the right pane.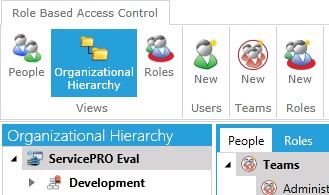
Organizational Hierarchies are categories overseeing the folders that users are assigned to, rather than the users who are part of those teams.
Roles
Likewise, Roles View will arrange People and Organizational Hierarchy in the secondary pane.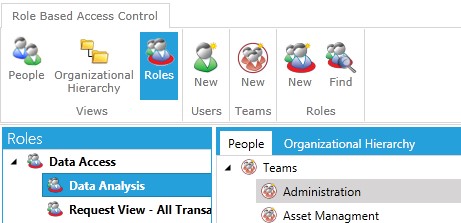
Permissions and Examples
Though not explicitly labelled, Permissions is the third pane that appears in most Views of the RBAC module, except for when you are viewing the Team or Team Assignments tabs. Depending on which tab you have selected in the middle pane, you will view permission checkboxes for People, Organizational Hierarchy or Roles.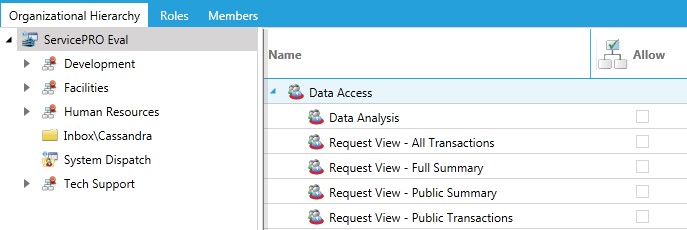
This third pane allows you to set permissions with checkboxes for Allow and Deny respectively. There are also choices to Allow or Deny permissions for an entire Subtree.
Permissions include categories such as Data Access, Request, System Management, and User Defined Roles. They also have subcategories that divide the permissions more specifically to further customize what a user can access.
When setting permissions for Teams, the Deny checkboxes are disabled. They are enabled when you are setting permissions for Users, however.
For example, many users, such as Peter Adams are granted “Support Rep” permissions for their own folders, under
- ServicePRO Eval > Tech Support > Inboxes.
However, users will not be able to have Support Rep permissions over other user folders. Peter Adams, in this case, would not have Support Rep permissions over Allison Cameron’s folder. However, as a major Support Rep, Peter Adams has permissions for viewing all sorts of other Requests.
Likewise for teams, the entirety of the Tech Support folder only has permissions for Update Only, under User Defined Roles. The Human Resources Support Reps have Standard Rep permissions for their own Human Resources folder, but not any other Team folders.

People View – Ribbon Items
New Users
The New User window is divided into a multitude of ribbon options.
- Under Main Tab, you are provided fields for entering that User’s basic information.
- Under User Properties you can enter basic contact and categorical information for a User, including their User Type, their Name, and the Company they are part of. You may also choose to set them as either an Internal User, which is a User within your own organization, or an External User, who may be a client belonging to another Company. In that case, the Company dropdown field will be available, and you may choose to classify which Company they are part of.
- Contact Information and Workstation Information entered will also be displayed when viewing that User’s Properties.
- The Logins/Email tab allows you to provide additional contact information, such as passwords for logging in, and their Email contact information. You can enable or disable these options via Radio Buttons.
- The Secondary Emails tab for a user is an alternative Email that can be set and added or removed from a list.
- The Memo tab allows you to set comments for that User, whether it is for describing that User’s relevance to Inventory, or additional comments about that User.
- The Support Rep tab allows you to set Quotas for requests that the User is allowed to have open, to restrict the workload given out at that time. Here you may also set Hourly Rates, for when these costs are effective by, and their base cost. In addition, a Support Rep can be designated with additional charge rates if they are paid extra on time-based events, such as client consultations.
- The Custom Fields tab will also appear if there is a custom user type set on this user. It allows you to add additional fields that are not available in the User window.
Once completed, you can save the User and associated information by clicking the Save icon in the upper left corner.
Find (Users)
Under Find in the People view, you are given options to search for Users in the following ways:
- Find in Tree allows you to search for users specifically in the tree you have selected
- Find in ServicePRO allows you to search for all Users in the database
Assign to Team
The Assign to Team icon brings up the Find a Team Window. This window features several options in the Ribbon for managing teams:
- Create a New Team, and
- Manage Search, which has the following four options for changing the search view:
- Set Current Search Filter as Default will set it so your current search results always come up first when searching teams.
- Restore System Default Search Filter will set the beginning search filter options back to the default
- Customize Search Display Properties will give you options to rearrange columns
- Restore System Search Display Properties will set the beginning column arrangement back to the default
Below the ribbon, you are given additional search criteria options for Teams.
New Teams
The New Team form requests the Name of the Team, as well as Users who are part of it.
- Click on Add User to select from a list of Users, or Remove to remove a selected user from the list.
- To save New Team information, click on the Save icon in the upper left corner.
Find Teams
Similar to the Find Users form, this is used to search for Teams by name.
New (Roles)
The New Role window is similar to the New Team window.
Organizational Hierarchy View – Ribbon Items
Some of the ribbon options present in People View are also present here.
Exclusive to Organizational Hierarchy View are the Folder or Organizational Unit ribbon items:
- New Folder gives you options for:
- Dispatch opens the New Dispatch window, allowing you to set the Name and Type for the Dispatch.
- Dispatch Types can be Generic or an existing Request Folder
- Unchecking the option, “Allow request to be Approved in this folder” will enable you to select the “Allow request to be Closed in this folder” option.
- Generic Folder opens the New Generic Folder window,
- This allows you to set up a New Generic Folder by entering the Name, and its type
- Similar to New Dispatch, you can enter
- Find allows you to search within Folders or Organizational Units.
Roles View – Ribbon Items
The Roles View functions are largely similar to the other options available in People and Organizational Hierarchy. The difference here is you can search by Roles using Find Roles.
Managing Roles
Managing roles is a matter of knowing the “who”, the “what”, and the roles you wish to implement. The “who” refers to the people and teams. The “what” refers to OUs and folders. The roles are the roles you wish to assign. The order in which the “who”, “what”, and roles are set is up to you and what you are trying to implement.
For example, you can select the Administration OU, select the Data Analysis role, and then select teams and users you would like to have that role on that OU. You could have also first chosen the Data Analysis role, selected a user or team and then selected the OU and folders on which you would like them to have this role.
Complete the following steps to assign and manage roles within ServicePRO:
- From the Administration tab, click on the Role Based Access Control option.
- The Role Based Access Control window opens. It contains one tab as shown in the figure below.
 Image title
 - Select the desired starting point by clicking the People, Organizational Hierarchy, or Roles icon from the Views task group. This will display the selected objects within the box on the left. For Example: selecting People will display all Teams and Users.
- Select the team, user, folder, or role you wish to start with. If you are unable to find the object, utilized the search options on the ribbon.
- Once selected, the main area of the windows will display two tabs (a third tab will be displayed regarding team membership if a user or team was selected in step 4). Choose a tab and select an object. For example: If you have selected a team or user, you can choose the Organizational Hierarchy tab and select the OU or folder. Notice that some objects on this tab may be bolded. This conveys which objects already have roles set.
- Click the check boxes of the appropriate roles. For example: With a team and folder selected, you can select the desired roles. Allow Entire Sub-tree will grant the role to the selected OUs or folder as well as all others below.
- Click the Save icon in the Toolbar to save changes.
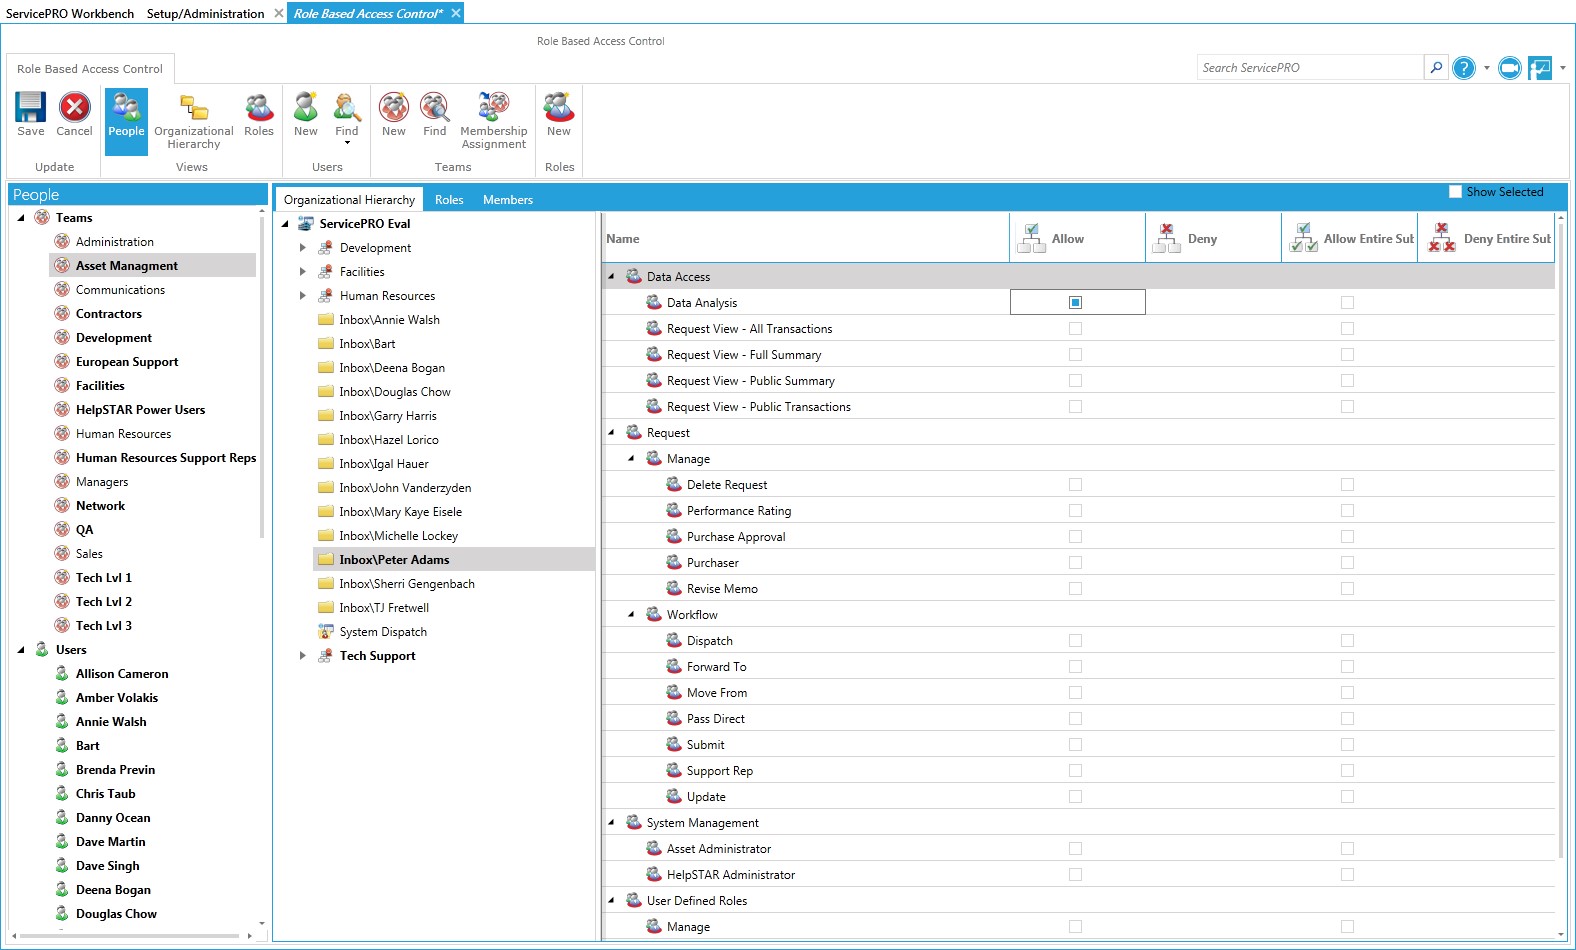 Role Based Access Control Window
